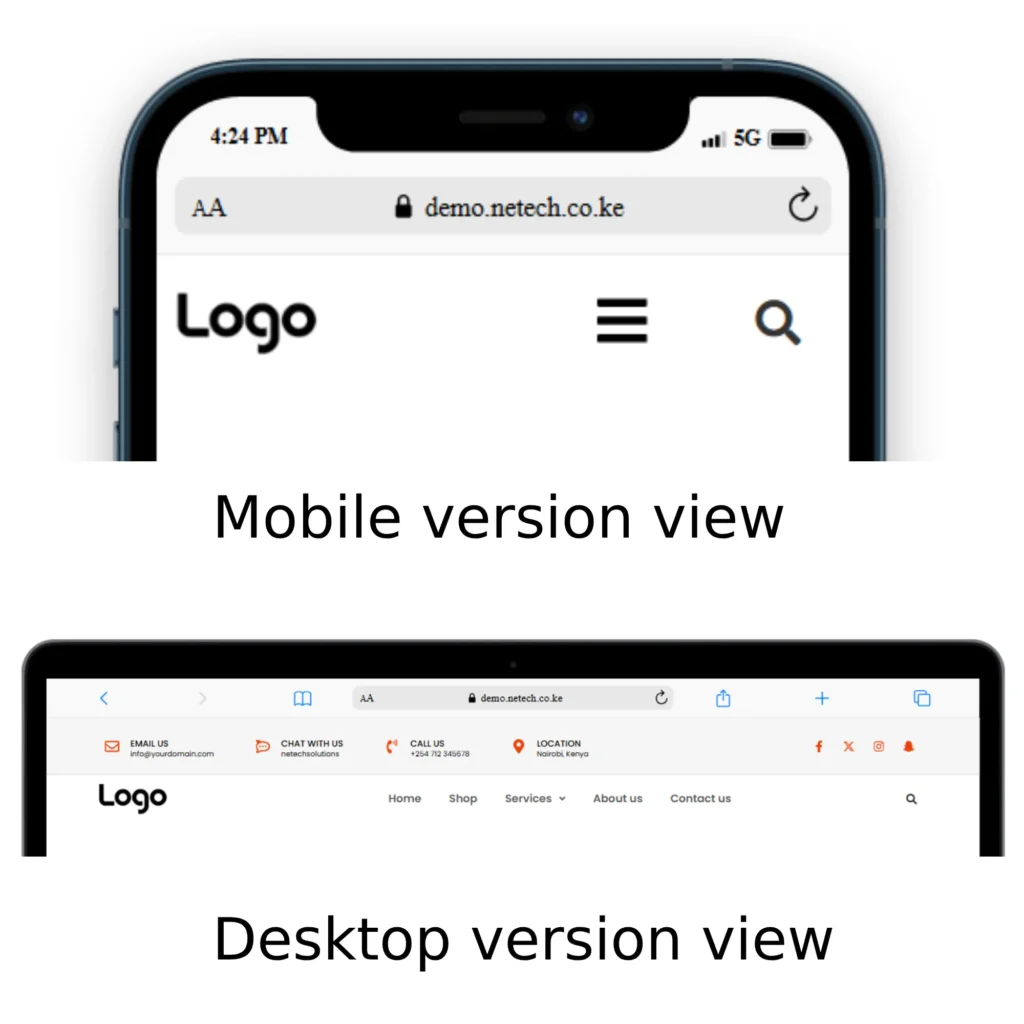
If you run a business in Kenya, integrating M-PESA with your WordPress website can significantly streamline payments, making it easier for your customers to pay for products and services. This guide will walk you through the entire process, from setting up the Daraja API to installing the mpesa WooCommerce plugin on your WordPress site, configuring it, and testing to ensure everything works smoothly.
1. Setting Up the Daraja API 2.0 Sandbox
The first step in integrating M-PESA with your WordPress website is setting up the Daraja app. Safaricom’s Daraja API is what allows your website to communicate with the M-Pesa system. The sandbox is used for testing purposes. Steps on going live is discussed in chapter 2 below.
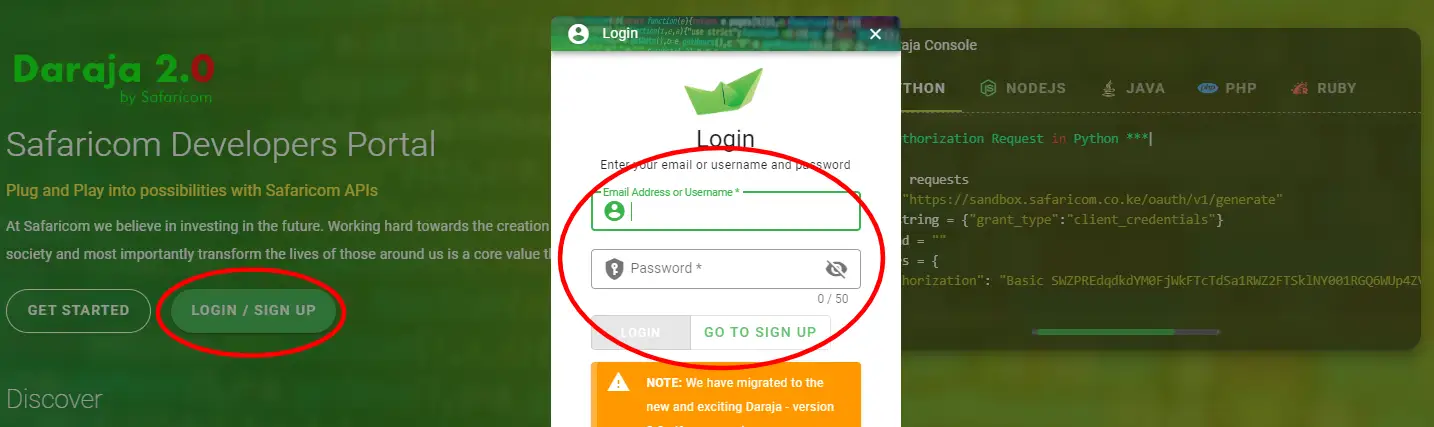
Step 1: Sign Up on Safaricom Developer Portal
- Visit the Safaricom Developer Portal and create an account.

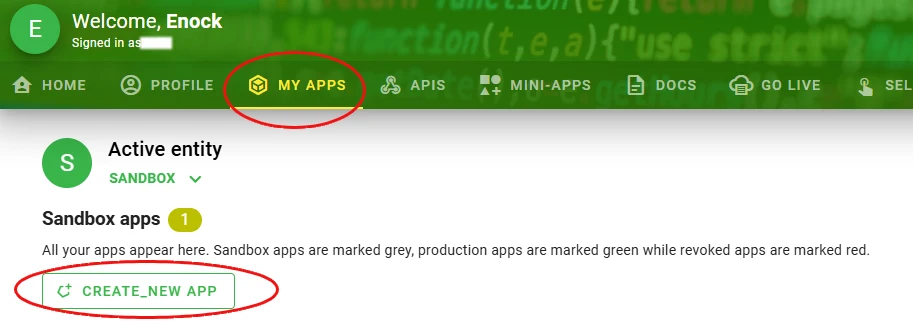
Step 2: Creating your sandbox testing app
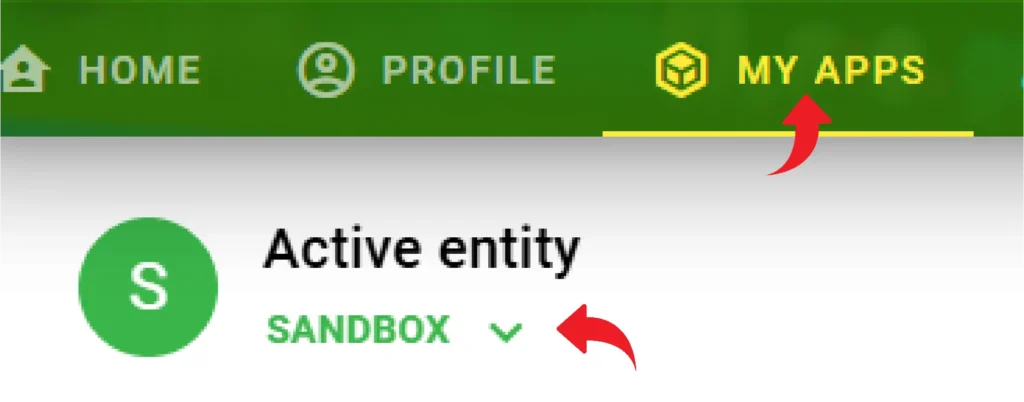
- Once logged in, go to the “My Apps” section and create a new app.
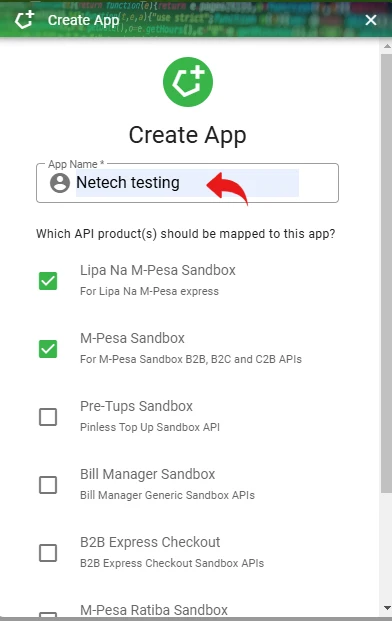
- You will need to provide a name for your app and select the API product you want to use (M-Pesa Express, C2B, B2C, etc.) and click on create app button.
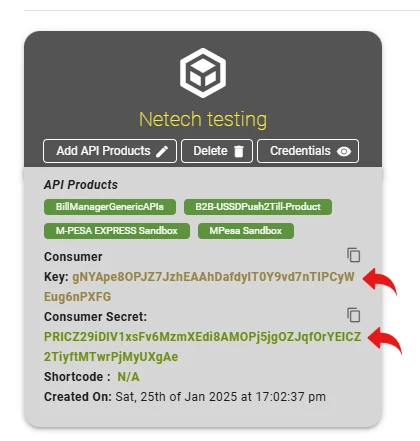
Step 3: Get Your Credentials
- After creating your app, you will be provided with a
Consumer KeyandConsumer Secret. These credentials will be used to authenticate your application. - Keep these credentials safe, as you’ll need them when configuring the plugin on your WordPress site.
2. Installing mpesa WooCommerce Plugin on WordPress
Once your Daraja app is set up, the next step is to install the mpesa WooCommerce plugin on your WordPress website.
Step 1: Install the Netech mpesa WooCommerce Plugin
- Log in to your WordPress dashboard.
- Navigate to Plugins > Add New.
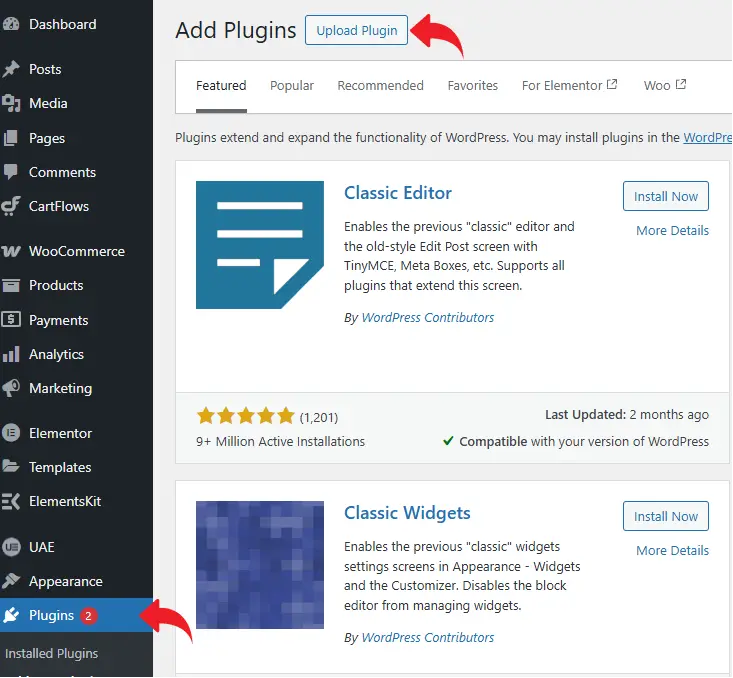
- Upload the plugin that you just downloaded earlier.
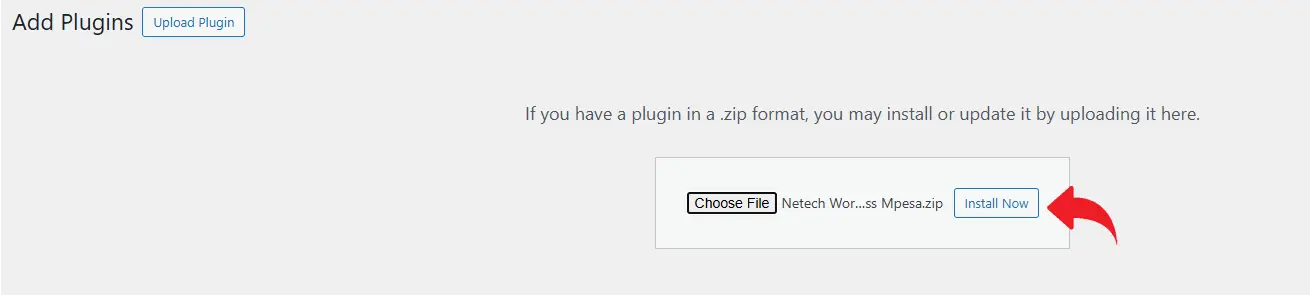
- Click Install next to the plugin, then click Activate.
Step 2: Configure the Plugin
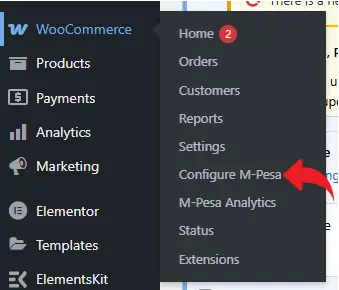
- Once activated, go to WooCommerce > Settings.
- Navigate to the Payments tab, and you’ll see M-Pesa as an option. Alternatively, you can hover on WooCommerce tab on the sidebar and select Configure M-Pesa link.
3. Configuring the M-Pesa Plugin
With the mpesa WooCommerce plugin installed, you now need to configure it to connect with your Daraja app.
Step 1: Enter API Credentials
- In the M-Pesa settings, enter the
Consumer KeyandConsumer Secretfrom your Daraja app. - Fill in other required fields, such as
Shortcode(this is your business number or Till number) andPasskey(obtained from Safaricom).

Step 3: Customize Payment Instructions
- You can customize the instructions that will appear to customers when they choose M-Pesa as their payment method.
- Save all the settings once you’re done.
4. Testing the Integration
Before going live, it’s essential to test the M-Pesa integration to ensure everything works correctly.
Step 1: Enable Sandbox Mode
- Go back to your mpesa WooCommerce plugin settings and enable Sandbox mode. This allows you to simulate transactions without using real money.
Step 2: Make a Test Transaction
- Go to your website and add a product to the cart.
- Proceed to checkout and select M-Pesa as the payment method.
- Complete the transaction using the test credentials provided by Safaricom in Sandbox mode.
Step 3: Check Transaction Status
- After completing the test transaction, check your Daraja app and website backend to ensure the payment was processed successfully.
- If everything works as expected, disable Sandbox mode and switch to live mode.
3. Going LIVE
After testing everything using Sandbox. The next step is to go live so that you can start receiving real payments.
Step 1 :Business portal creation
Write an email to M-Pesa business team via this email (M-PESABusiness@safaricom.co.ke) and request them to create you a business administrator portal. Download this M-Pesa business Administrator application form and attach it when mailing the business team. If you have challenges on how to fill the document or how to write the email to M-PESA business team, feel free to call for guidance.
After M-PESA business team as created your portal, you will receive an email to the selected email of the administrator you have selected containing the username and the password to loin to the business portal below. You can access the portal via this link.
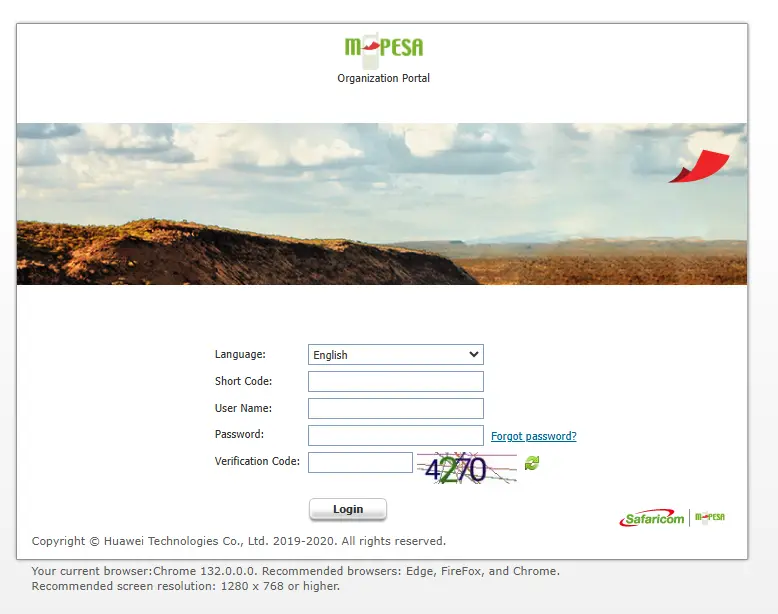
Reset your default password to activate your administrator portal account.
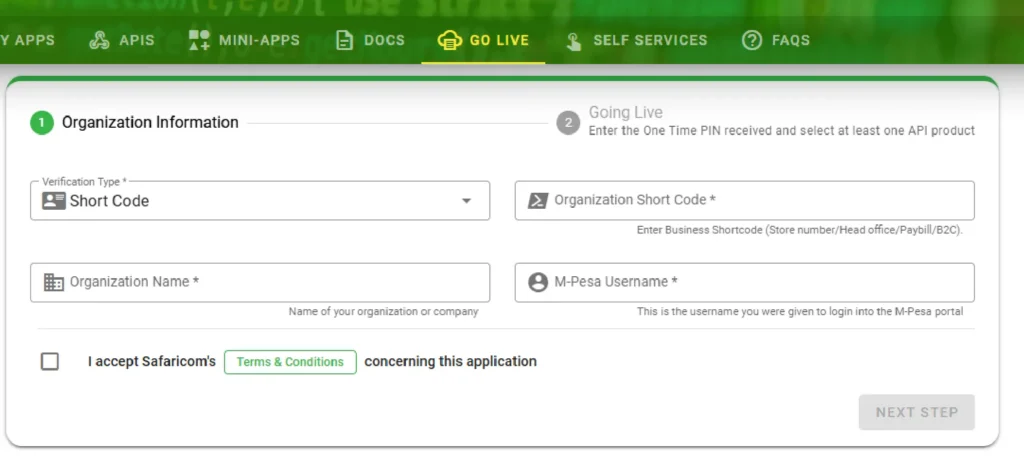
Now navigate to Daraja portal and click on Go live tab. Select Short Code as your verification type, enter your organization short code (either store number, Head office number or Paybill number). Enter your organization name and M-Pesa username. Please note that this username is the one that you requested the M-Pesa business team to use when creating your administrator portal credentials.
The selected administrator will receive the going live credentials, i.e. webhook links and passkey.
Now navigate to Daraja portal and switch from sandbox to the live app as shown below:
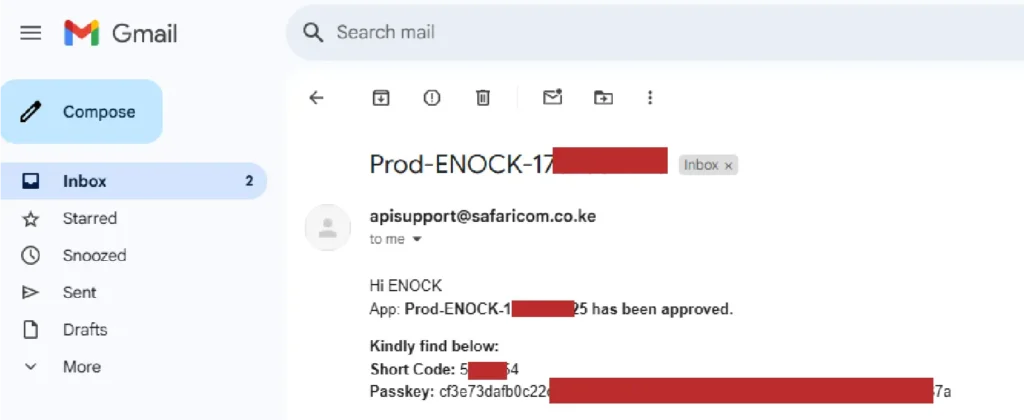
Now copy the Consumer key, Consumer Secret, Short code and paste them on the plugin as shown below. You will get the Online passkey from the email received after going live. If you don’t have it, write an emaail to M-Pesa API support team via apisupport@safaricom.co.ke to request for the same and activate your app:
Finally, test the final changes and push your app live, ready to receive online payments. If you might need any help in configuring the whole plugin, kindly let us know. You can WhatsApp, Call or email our support team via support@netech.co.ke for assistance.